TESCO News and blog resources


Medication-Assisted Treatment Clinics: Deliver Lifesaving Services

Mobile Simulation Clinics: Taking Medical Training on the Road

TESCO Specialty Vehicles' Command Units Deliver Safety and Reliability

The TSV Build Process: From Concept to Completion

TESCO Specialty Vehicles Offer Units Ready for Specialty Shells Immediate Delivery

Mobile Behavioral Health Units: Making Mental Health Care Accessible

Mobile Office Units: Portable Workspaces for Modern Businesses

TESCO Specialty Vehicles' Bookmobiles Transport Literacy to All

MOBILE Health Care Act: Delivering Healthcare Equity

Redefining the Future of Patient Care with Mobile Dental Clinics

Offering Accessible Healthcare Services to BGSU Students

SUPPORTING HEAL CORP IN HURRICANE HELENE RELIEF EFFORTS

TESCO SPECIALTY VEHICLES LEASING & RENTALS

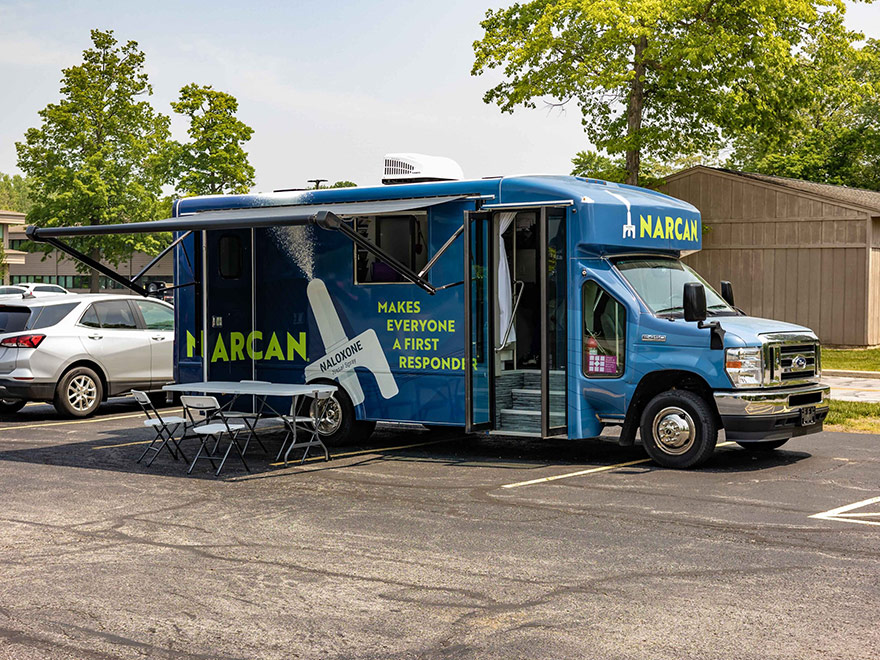
LUCAS COUNTY HEALTH DEPARTMENT: MOBILE NARCAN CLINIC

CNCHC: IMPACTFUL WORK WITH MOBILE MEDICAL CLINICS

UTMC RIBBON CUTTING CEREMONY

Van Terra – Compact Mobile Medical Unit for Sale

Vinyl Vehicle Wraps Promote Access to Healthcare Services

10 Steps to a Successful Vehicle Wrap Design and Installation

Mobile Medical Van: Accessing Community Need and Impact

TESCO Specialty Vehicles Celebrates Healthcare Quality Week

Mobile Medical Units: Pioneers of Healthcare and Education

The Impact of Bookmobiles: Driving Literacy and Community Connection

Honoring TESCO Specialty Vehicles on being distinguished by the Healthcare Leadership Council

Celebrating Indigenous Peoples’ Day: Advancing Equitable Healthcare Access with Mobile Clinics

Unlocking Better Health: Preventative Care in Mobile Medical Clinics

Commercial-Built Mobile Clinics vs. Retrofitted RV Mobile Clinics

Empowering Communities: Mobile Addiction Treatment Services Now Available in Manistee County

Enhancing Community Health Access: The Impact of Federally Qualified Health Centers and Mobile Medical Units

The Importance of Mobile Pediatric Care in Building Trust

Empowering Community Health: A Nonprofit and Federally Qualified Mobile Healthcare Clinic

The Advantages of Mobile Medical Clinics: Bringing Healthcare to Underserved Areas

Mobile Clinic: Increasing Access to Dental and Medical Care

Enhancing Healthcare Access: Waianae Coast’s Mobile Medical Clinic Serves Underserved Oahu Communities

Starting Your Own Mobile Medical Clinic Program

TESCO Specialty Vehicles presented with the Redefining American Healthcare Award

Reducing Travel Barriers and Expanding Nutritional Access for Women, Infants, & Children

Mobile Women’s Health Clinic

Community Health Van

Mobile Dental Clinic

Mobile Clinical Trials

Improving Access of Isolated Amish Communities

Mobile Clinic provides access to rural pediatric care

Opiate Addiction- Mobile Unit Treatment coming to Portage Wisconsin

Mobile Clinic Provides Overdose Prevention

Providing Mobile Dental & Medical Care in Hawaii
Get Started with TESCO Specialty Vehicles
When you work with TESCO Specialty Vehicles you know you’re getting proven quality from a trusted dealer. Get started with us today to see why we’re one of the largest dealerships handling new and used specialty vehicle sales in the nation.